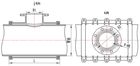
When you need to add a branch connection to an existing pipeline without shutting down service, two products come up in the specification process: saddle clamps and tapping tees. Both clamp onto the outside of the main. Both create a branch outlet that a tapping machine can drill through. They look similar enough in a catalogue that engineers sometimes treat them as interchangeable. They are not.
This guide draws the line clearly — when each fitting is the right call, and where mixing them up causes failures.
What each product does
Saddle clamp (service saddle / branch saddle)
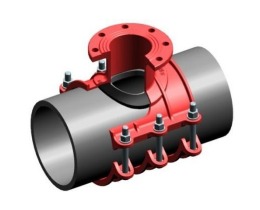
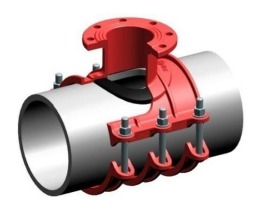
A saddle clamp is a two-piece circumferential fitting that bolts around the outside of a pipe to create a branch outlet. The body is typically QT450-10 ductile iron (for DI and steel mains) or a nylon-reinforced polymer (for PE and PVC). The fitting includes a threaded or flanged branch outlet in DN25 to DN300 range, depending on the main size.
The saddle clamp provides:
- A sealed connection to the outside of the main pipe
- A structural anchor point for the branch
- A boss through which the tapping machine drills to penetrate the main wall
After drilling, the tapping machine is removed and the branch is live. The saddle remains permanently in place as part of the piping system.
Saddle clamps are designed for branch connections that are a fraction of the main diameter — typically following the 60% branch-to-main ratio rule (see our saddle clamp sizing guide for the full sizing table).
Tapping tee (full-circumferential tapping sleeve)
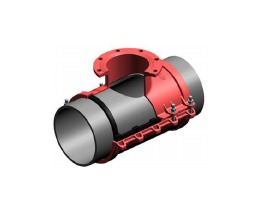
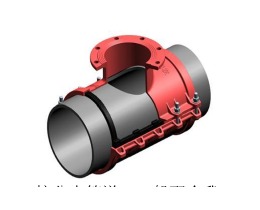
A tapping tee (also called a tapping sleeve) is a full-circumferential fitting: two halves that bolt together around the pipe, forming a pressure-rated enclosure at the branch point. The tapping tee is larger, heavier, and designed for larger branch sizes relative to the main — up to 100% of the main diameter in some configurations.
Unlike a saddle clamp (which seats on the top of the pipe and relies on a gasket at the saddle footprint), a tapping tee seals the entire circumference of the pipe at both ends of the sleeve body. This distributes the pressure load around the pipe wall rather than concentrating it at the outlet boss.
After installation, a tapping valve is bolted to the tapping tee outlet, the tapping machine drills through, the coupon is captured, the valve is closed, and the machine is removed — leaving a live branch with an in-line isolation valve.
Direct comparison
| Attribute | Saddle Clamp | Tapping Tee |
|---|---|---|
| Typical pressure rating | 1.0–1.6 MPa | 1.6–2.5 MPa (varies by design) |
| Max branch-to-main ratio | ~60% | Up to 100% |
| Pipe materials compatible | DI, PE, PVC, PPR, concrete, steel | Ductile iron, carbon steel, HDPE |
| Sealing area | Saddle footprint only | Full circumferential gaskets at both ends |
| Hot tapping required | Yes — drills through main wall | Yes — always used with tapping machine |
| Isolation valve included | No — branch flows immediately after tap | Usually yes (integral tapping valve) |
| DN range (branch) | DN25–DN300 typically | DN50–DN1000 |
| Structural load on main | Localized at boss | Distributed around circumference |
| Unit cost (indicative) | $80–$2,000 depending on size | $600–$12,000 depending on size |
| Installation complexity | Low–moderate | Moderate–high |
| Long-term permanence | Permanent | Permanent |
When a saddle clamp is the right choice
Service connections on distribution mains: The classic application. You have a DN150 or DN200 water main and need to tap a DN25, DN32, or DN50 service line to a building or hydrant. This is exactly what a haff-type saddle clamp is designed for — fast, lower cost, and structurally appropriate for the ratio involved.
Plastic pipe (PE, PVC, PPR): Tapping tees for plastic pipe are available but less common. Saddle clamps designed for plastic mains use wider gasket footprints to accommodate the creep behaviour of thermoplastic pipe walls. For DN90 to DN315 PE distribution mains, a plastic pipe saddle clamp is usually the most economical and available solution.
Low to medium pressure systems (below 1.0 MPa): At these pressures, the localized sealing mechanism of a saddle clamp is adequate. Municipal water distribution typically runs 0.3–0.8 MPa. Unless there are other complicating factors (aggressive soils, large branch, highly corrosive fluid), a quality QT450-10 or polymer saddle clamp handles this reliably for 25+ years.
Multiple service taps along a main: In residential subdivision builds where you’re adding 20+ service saddles along a new main, the cost difference compounds. If a tapping tee costs 5× more per connection, that’s a substantial project-level budget impact for connections that don’t require the structural capacity of a tapping tee.
Tight budget with appropriate pipe conditions: When the pipe is in good condition, the branch ratio is within spec, and pressure is moderate, a saddle clamp is genuinely the right engineering answer — not a compromise.
When a tapping tee is the right choice
Large branch-to-main ratio (above 60%): Once the branch diameter exceeds roughly 60% of the main diameter, the structural analysis changes. The stress concentration at the branch outlet can no longer be managed by a saddle footprint — you need a sleeve that encircles the pipe and distributes load. Tapping tees are designed for this geometry. If you need a DN300 branch off a DN400 main, you need a tapping tee.
High-pressure steel transmission mains: Steel transmission mains running at 1.6 MPa or above, carrying potable water or process fluids, generally require the full circumferential sealing of a tapping tee. The saddle clamp’s gasket footprint, which only covers part of the pipe circumference, does not provide adequate restraint at sustained high pressure over decades.
Major distribution infrastructure connections: When the branch is itself a new distribution main — DN200 or larger — the connection is a permanent infrastructure decision. Specifying a tapping tee with an isolation valve means you can isolate the branch in future maintenance without touching the main. A saddle clamp with no integral valve leaves no isolation option at the branch.
High-temperature or aggressive chemical service: Tapping tees with stainless steel body and full-circumference sealing handle chemically aggressive service better than polymer saddles. The structural integrity over temperature cycles is also superior to a saddle design.
Systems requiring regulatory compliance: Some utilities and codes specify tapping tees for any branch above 50 mm (2 inches) regardless of pressure. AWWA practice guidelines generally draw this line at 50 mm outlet — above that, a full tapping sleeve + valve is standard. Check your applicable codes before specifying.
Installation notes: saddle clamp
The installation sequence for a saddle clamp before hot tapping:
- Clean the pipe surface. Remove soil, encrustation, and loose coating over the full saddle footprint. Bare metal (for DI/steel) or bare pipe wall (for plastic). Surface contamination is the leading cause of saddle seal failure.
- Position and align. Center the saddle outlet on the pipe. The outlet should be at approximately the 12 o’clock position (top of pipe) on water mains — this prevents debris from accumulating in the branch when it’s not flowing.
- Hand-tighten all bolts. Then tighten in cross pattern to approximately 30% of final torque. Repeat at 60%, then at 100% of specified torque. Never tighten sequentially around the clamp — this skews the gasket.
- Pressure test before tapping. Bring the saddle to 1.5× operating pressure before attaching the tapping machine. This confirms the saddle seal is sound. A leaking saddle under hydrostatic test is far easier to remediate than a leaking saddle with a tapping machine attached under full line pressure.
- Verify bolt torque after pressure test. Some bolt relaxation occurs after pressurization — re-check and torque to spec.
Torque values are saddle-specific. For QT450-10 DI haff-type saddle clamps in DN80–DN300 range, typical bolt torque is 40–80 N·m for M16 bolts. Always use the manufacturer’s table, not a generic bolt-torque chart.
Installation notes: tapping tee
The tapping tee installation adds steps compared to the saddle clamp, because the sleeve must seal the full circumference:
- Excavate and clean pipe. You need clearance around the full pipe circumference to install both halves of the sleeve — typically 300 mm clearance each side of the sleeve body, and access to the underside of the pipe.
- Inspect pipe wall condition. Before committing to a tapping tee, verify pipe wall thickness at the tap location. Heavily corroded steel pipe with wall thinning may not support the tapping operation safely. Take an ultrasonic thickness reading.
- Install sleeve halves and gaskets. The full-circumference gaskets at each end of the sleeve must be fully seated before torquing bolts. Partial seating causes end leaks that are difficult to remediate after installation.
- Torque sleeve bolts to spec. Tapping tee bolts are typically larger (M20–M30) and higher torque (80–200 N·m) than saddle clamps. Calibrated torque wrench required.
- Attach the tapping valve. The tapping valve bolts to the branch outlet flange of the sleeve. Verify flange rating matches the sleeve pressure class.
- Pressure test the assembly. Test to 1.5× operating pressure before tapping.
- Attach tapping machine, drill, capture coupon, close valve, remove machine.
The additional labour on steps 1–4 is why tapping tees are more expensive on a total installed basis — the fitting itself is already more costly, and installation is more time-intensive.
Combined use: saddle clamp plus hot tapping machine
A saddle clamp is not a tapping tee — but when used with a hot tapping machine, it enables the same basic outcome: a live branch connection without service interruption.
The typical workflow using PipeKnot’s DK6 series electric tapping machine:
- Install the haff-type saddle clamp for DI pipe on the main, following the sequence above.
- Pressure test.
- Attach the DK6 tapping machine to the saddle outlet boss (the machine seals against the threaded outlet or flanged connection of the saddle).
- Drill through the pipe wall under full line pressure. The machine’s pressure seal prevents any flow loss during drilling.
- Retract the cutter with the pipe coupon captured inside the machine body.
- Close the saddle’s integral valve (if equipped), or close a separately-installed ball valve before removing the machine.
- Remove the tapping machine. Connect the branch line.
The DK6 operates on DN80–DN600 mains. For steel pipe and larger DI mains up to DN800, the DK8 series handles the heavier pipe wall. For small service connections on DN50–DN110 plastic pipe, a hand-operated drill unit may be appropriate.
This combined approach — saddle clamp plus tapping machine — is the standard method for service connections across municipal water, gas distribution, and industrial process piping. The tapping tee is reserved for the higher-pressure, larger-branch applications where the saddle clamp’s structural limitations apply.
Decision checklist
Before specifying either product, work through these questions:
- What is the main pipe material? (DI, PE, PVC, steel, concrete)
- What is the measured OD of the main? (measure with calipers — don’t use DN nominal)
- What is the required branch size (DN)?
- What is the branch-to-main ratio? (branch OD / main OD)
- What is the operating pressure of the main (MPa)?
- Does the branch connection require an integral isolation valve?
- Does a tapping machine need to be rented or is one in-house?
- Is there access to the underside of the pipe for a full-sleeve installation?
- What does the applicable code require for the outlet size?
If the ratio is below 0.6 and pressure is below 1.0 MPa: saddle clamp is likely the right answer. If the ratio is above 0.6 or pressure is above 1.0 MPa: evaluate a tapping tee. If the branch is above 50 mm and the code follows AWWA practice: check whether a tapping sleeve is mandatory regardless of other factors.