Saddle clamps (also called split tees, service saddles, or branch saddles) are the cheapest and fastest way to add a branch to an existing main. They’re also the easiest to misapply. This post walks through the two sizing questions that matter most — what branch size your main can take, and when a saddle clamp is no longer the right tool.
The branch-to-main ratio rule
The cardinal rule: the branch diameter should not exceed about 60% of the main diameter for standard saddle clamp applications. Beyond that ratio, the structural load on the main becomes high enough that a saddle clamp can deform the main or create stress concentrations that lead to cracking.
In practice:
| Main Size (DN) | Max branch (saddle clamp) | Typical use |
|---|---|---|
| DN100 | DN50 | Service connections, hydrant branches |
| DN200 | DN100 | Lateral connections |
| DN300 | DN150 | Major laterals |
| DN600 | DN200 (pushing the limit) | Large laterals; consider full tee |
| DN800+ | DN300 maximum | Almost always use a tapping sleeve instead |
Beyond these limits, switch to a tapping sleeve + valve arrangement — a full-circumferential fitting that distributes load evenly around the main.
When the simple service clamp isn’t enough
AWWA practice and several other jurisdictions draw the line at about 2 inches (50 mm) of outlet size for a simple service clamp or saddle. Branches larger than 2 inches generally require a tapping sleeve and valve installed as a circumferential fitting — not a saddle clamp.
Why: a 2-inch outlet on a DN100 main is already at the 50% ratio where bending stress on the main becomes significant. At DN200 or higher branch on a smaller main, the failure mode shifts from “gasket leak” to “pipe crack” — and that’s a structural failure, not a seal failure.
Pressure derating at larger sizes
Saddles are generally pressure-rated in steps as sizes increase. A typical rating curve for HDPE-type saddles:
- IPS up to 4 inches nominal: 235 psi (≈1.6 MPa)
- 6 inches: 200 psi (≈1.4 MPa)
- 8–12 inches: 150 psi (≈1.0 MPa)
For cast-iron and ductile iron saddle clamps (like PipeKnot’s DI saddle clamp split tee), pressure rating holds at 1.0 MPa standard (1.6 MPa high-config) across the full DN80–DN1400 range — but the branch size derates. DN1400 main × DN600 branch is close to the structural limit; you should specify a cast-iron design with a stiffening ring.
Sizing decision tree
Step 1: What’s the main diameter? (measured OD, not nominal)
Use calipers. DN100 DI pipe is typically 118 mm OD; DN200 is ~222 mm; DN300 is ~326 mm. Specific values depend on pipe class and manufacturer — always measure.
Step 2: What’s the branch diameter you need?
The branch is usually set by the downstream system. If the downstream asks for a DN100 service line, you need a DN100 branch.
Step 3: Calculate the ratio (branch OD / main OD).
If it’s below 0.5: saddle clamp is comfortable. If 0.5–0.6: saddle clamp with careful specification (reinforced, high-config). If 0.6–0.8: consider a full tee or tapping sleeve + valve. If >0.8: definitely tapping sleeve + valve. A saddle here will fail structurally.
Step 4: Check pressure class.
Main pressure class should be ≤ saddle clamp rating. If main is PN16 and the saddle clamp at your branch size is rated PN10, you’re non-compliant. Either upgrade the saddle spec or re-engineer the connection.
Step 5: Check pipe material compatibility.
Saddle clamps are material-specific. Using a DI saddle clamp on a concrete main won’t seal (surface roughness differs). Use a concrete pipe haff clamp for concrete; plastic pipe saddle for PE/PVC/PPR.
Installation considerations that affect sizing
Soil conditions: in unstable soils (peat, high water table), lateral movement of the main puts bending stress on the saddle. Consider oversizing the saddle clamp length to distribute load.
Thermal expansion: pipes expand and contract with temperature. On long above-ground runs, saddle clamps should be positioned near thermal anchors, not at mid-span, to avoid bending stress from pipe movement.
Vibration: near pumping stations or valves that operate frequently, saddle clamp bolts can loosen. Either use self-locking fasteners or plan periodic torque checks.
Ground settlement: newly backfilled trenches settle for 6–12 months. A saddle clamp installed during backfill may be under bending stress as the soil consolidates. Where possible, install laterals after initial soil settlement.
PipeKnot saddle clamp range
PipeKnot stocks saddle clamps in multiple configurations:
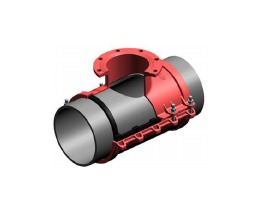
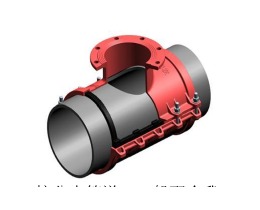
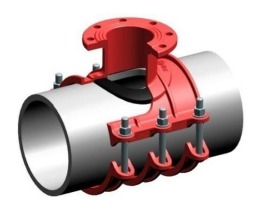
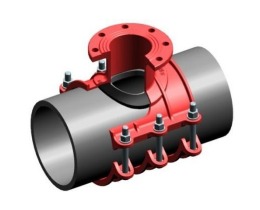
- DI saddle clamp (split tee) — DN80–DN1400 main, DN80–DN600 branch, QT450-10 body, EPDM gasket
- Haff-type DI saddle clamp — for smaller branches, DN80–DN800 main
- Concrete pipe haff clamp — DN100–DN600 main, matched gasket for concrete surface
- Plastic pipe saddle clamp — PE/PVC/PPR, wider gasket for creep resistance
- Haff-type plastic saddle — for smaller plastic branches
- Small DI saddle clamp (DN50 branch) — service connections
- Small plastic saddle clamp (DN25/50 branch) — service connections
If your branch exceeds 60% of main diameter or exceeds 50 mm outlet, talk to us about a full tapping sleeve + valve configuration instead.
Common mistakes we see
- Assuming saddle clamps are size-agnostic. The 60% rule is rigid — ignore it and you risk main damage.
- Over-torquing to stop a leak. If a saddle clamp leaks after spec torque, the cause is usually gasket misalignment or pipe surface contamination — not insufficient torque. Over-torquing cracks brittle pipe.
- Mounting on a pipe curve. Saddle clamps need straight pipe length of at least 2× clamp length on either side. Mounting near bends introduces bending stress.
- Skipping the pressure test before hot tapping. Once you’ve bolted the saddle, pressure-test to 1.5× operating pressure before you ever bring the tapping machine in. A saddle that leaks during cold-test will fail during the hot tap.
- Wrong gasket. For gas-service branches, the saddle needs NBR gasket (see our post on NBR vs EPDM). Standard EPDM is for water only.
Further reading
- Hot tapping vs. full shutdown: real cost comparison
- Hot tapping safety checklist
- DI vs Steel vs PE: how material changes your clamp choice
Sources
- Blair Supply — Determining the Correct Size of Service Saddles
- Uni-Bell Tapping Guide for PVC Pressure Pipe — PVC-specific sizing
- Spears PVC Clamp-On Saddles brochure (COS-2-0804) — pressure ratings by size
- McWane — What Are the Three Pipe Tapping Methods? — saddle vs. sleeve vs. direct tapping